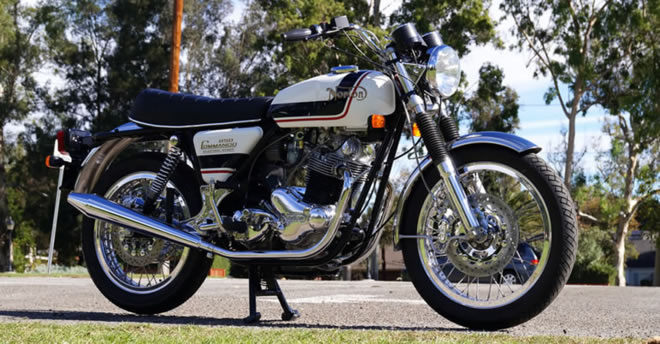
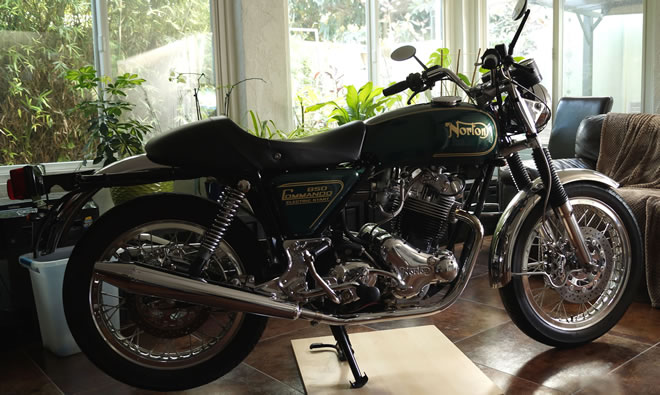
(Completed 2013)
I have created a database of all parts more than $1-
more details..
Norton Commando MK3 Rebuild Summary
I already owned my MK2 for many years and it was in good shape. I was having a bit of an issue starting it due to a bad back and it seemed a good idea to get my hands on a MK111 somehow. I was interested in a MK111 Commando due to the starter. So there was a MK111 on ebay in parts. The ebay photos looked good and the ad said it was 90 percent there. I think the bidding was around $2000 when I saw it with a few days to go on the auction. I said to myself I would go to $3000 on it. The plan was to build it quickly and ride it, to see what these MK111’s are like. Things got out of control, I had a few too many glasses of wine and the next thing I knew I won the bid at $4300. The bike was in Colorado (Denver) and I was in Southern California. So I left California on Saturday morning and drove to Denver non stop. Upon arrival I had a quick look at all the major parts, picked it up and was back in California by the following Monday.
Shortly after I started laying the parts out, evaluating what I had purchased:
A lot of galvanized parts, some triumph (very confusing):

Major motor and gearbox parts were still together:
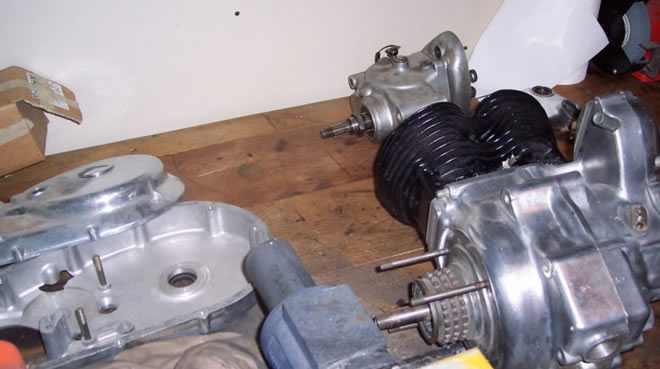
The frame had been powder coated, but it had a dent in the main downtube where something had been dropped on it. The wheels, forks and swinging arm were assembled.
It occurred to me at this time that many small items were missing. Upon researching further with the owner it turned out he took the bike to someone in Colorado to have it rebuilt. The person who was rebuilding it went mad and the ebay seller had to legally get back what he could, which meant going in to the mad mans shop and reclaiming all the parts of his bike that he could find. Hence the additional Triumph and Norton parts. None of this was listed in the Ebay ad of course.
I believe the speedo was original and it had under 7000 miles on it from new.
I am an able mechanic with hand tools, commando special tools and I have a lot of rebuild experience with earlier Norton Commando’s. After evaluating what I had purchased I soon realized this was going to be a bit of a nightmare. Not only because so much was missing, but because parts had not been labelled or bagged properly. Normally when I strip a bike down I am meticulous about what goes back where. This was a pile of bits with a Colorado registration.
This rebuild story is for my insurance company as well as fellow forum members and others to give you an idea what is involved and what it costs to do a rebuilt like this. I have built a database and added every receipt into it, so there are detailed costs and I will try to detail the rebuilt as best as I can remember. My final summary will be at the end. To see my rebuild costs by category look here.
OK- on to the technical:
Engine/ motor
The motor had an R4 head (manifolds were missing). It had a +20 bore along with a 4S cam. So the first thing I noticed was someone had been in there before due to the 4S cam.
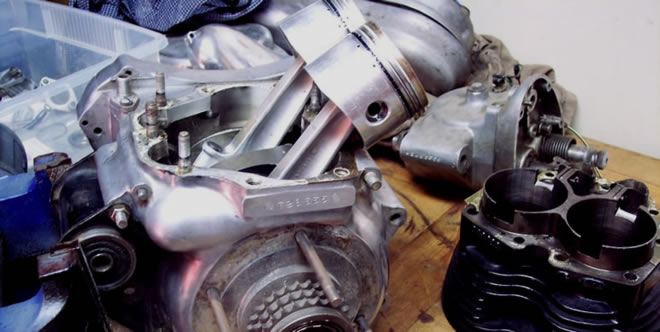
In general the plan was to rebuild it with a standard cam. After much deliberation I decided not to split the crank. These were the major things done to the motor:
- New superblends.
- All new seals.
- Refurbished oil pump.
- End floated crank.
- New cam.
- Custom Rocker Covers.
- +40 rebore.
- Head rebuild with standard valve gear.
- Prestolite 4 brush starter.
A lot of new parts were purchased for the motor. For full details see the motor rebuild pricing database figures here
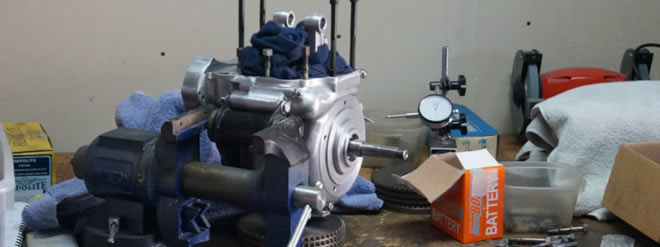
In general I was pretty happy how the motor came together. I had to split the casings a few times to get the crank end float right. I used some ISO shims behind the superblend outer races to get the end float right. There were no stripped threads and most nuts and bolts were there since I removed them.
I found a local machine shop to assist with getting the superblend inner races off the crank and new ones on. I found another local machine shop to do the rebore. They seemed to know about commando’s and had done a few 920 sleeves before. A good thing about being in Southern California is that these services are never far away!
I spent a long time on the oil pump ensuring all tolerances were good.
I noticed the oil check valve was missing so I added one. The pressure relief valve spring seemed wrong so I replaced everything there. The followers were a little rounded due to the 4S cam that was in it, so I spent a long time sorting them out. I used mushroom tappets on the valves as I like the way the are quieter and they seem to have better contact.
My good friend Ron Fratturrelli rebuild the head for me. I used new JCC pistons with Hastings rings (+40).
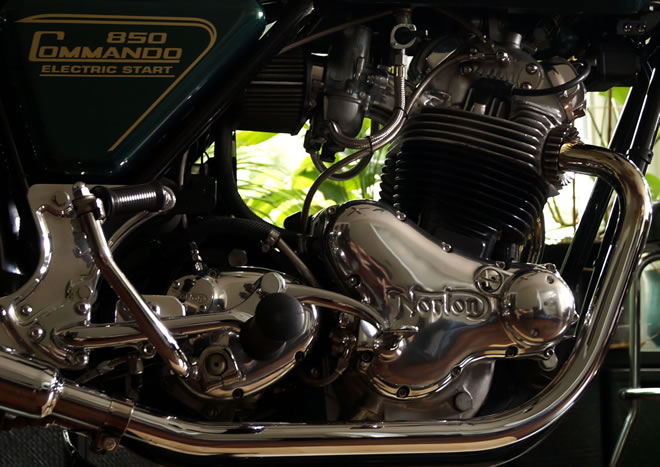
I purchased polished stainless crankcase bolts that were already cut to length (thanks Matt) as well as stainless braided rocker feed hose from Old Britts and some nice finned ally rocker covers from Eurotrash.
A new timing chain was fitted and valve timing was checked using a timing disk and dial gauge. It turned out it was right on with the timing marks on the pinions. Ignition timing was by TRI spark (more about that later all good ++). It is quite handy being an Amal dealer, so I had a few Amal premiers I was going to use. A very nice person on the forum gave me some carb manifolds 32 MM each end for the RH4 head as I did not have any.
There is a local finishing company called “Orange County Plating and Finishes”. They did all my engine case polishing, chroming and powder coating. Using a dremel and by hand I smoothed the crank cases up. I used VHT caliper paint on the cylinders and it turned out better than expected.
I am not sure if it should be covered in this engine section or in the frame section of my write up, but isolastics were missing as was the head steady. A new Comstock head steady was purchased from Jim at CNW.
When fitting the pistons I overlapped the Hastings oil rings at the ends. This is easy to do and looks like it is the way they are meant to be (if you don’t do this often). There are no instructions. So on original start up the bike was smoking on both sides. The oil rings should butt up at he ends and not overlap. Make sure you don’t do this like I did. A bit of a pain to take head and cylinders off again.
In the end the motor turned out well:

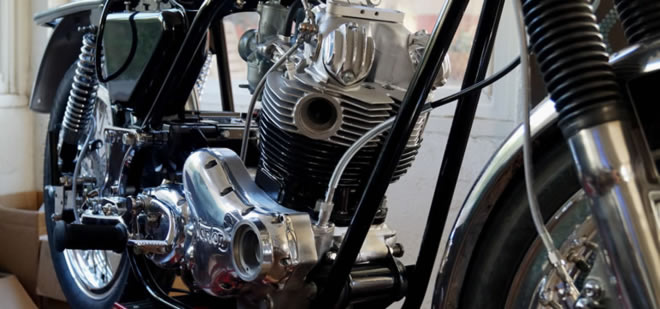
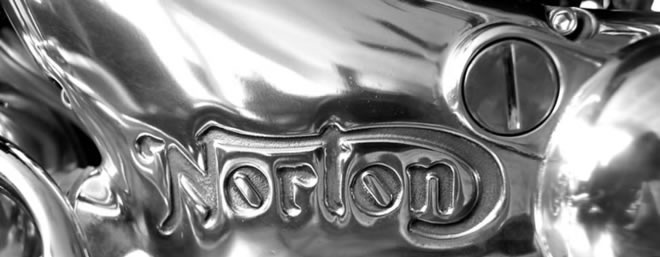
Gearbox
In general the gearbox was in good condition. Bearings & seals were replaced. The kickstart shaft was shot so I purchased a new assembly. Quite a few expensive parts were missing from the gearbox outer cover including the kickstart. I ended up spending a lot on the gearbox due to expensive missing parts. Also I broke the cam plate gear during assembly so I had to buy another one.
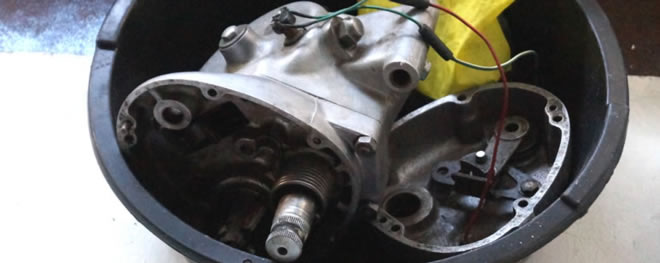
In the MK111 gearbox I found it a lot harder to align the quadrant and camplate than the earlier gearboxes. It took me 3 times to get it right.

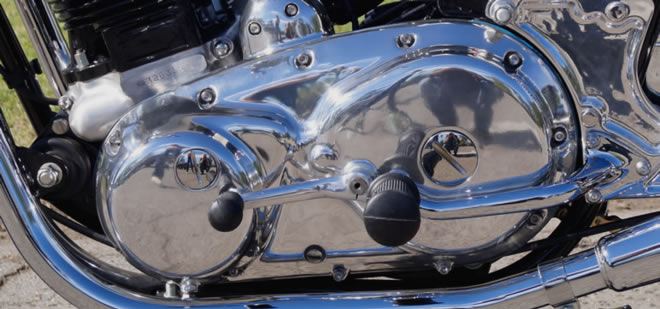
I purchased the hydraulic clutch kit from Matt (Made by Jim). The hydraulic action replaces the old cable pull mechanism in the secondary cover. This was an expensive upgrade, but now the bike is done, it is clear it was worth it. The only other change from standard was a stainless steel top nut and bolt. The cover was polished by OC plating and I used a dremel and wet/ dry to finish up the case.

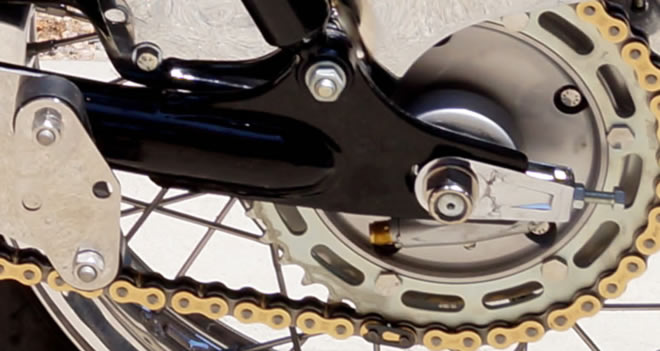
A new thinner 21 tooth countershaft sprocket was used to accommodate the upgraded O ring chain. I purchased an upgraded rear sprocket from Matt. It is a bolt up type that is supposed to be easier to change.
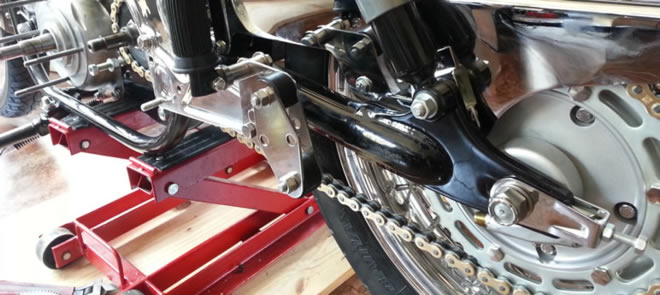
Primary Chaincase
I knew that the primary on MK111’s is a weak point, especially the starter mechanism. For this reason I decided to go over board. Many of the primary parts were missing or damaged.

All parts were renewed except for the clutch drum, clutch center and diaphragm spring that were okay. Rather than measure all the clutch plates and spacers to get the stack the right height, I purchased the clutch plates, spacer and end plate from Matt as he already has it all set up. I also purchased the clutch drum bearing and 3 phase alternator setup from him.
The casings were in good shape and were polished at OC plating. The only part that needed presetting was the starter back fire device. I set that up using a torque wrench per Fred’s tutorial at Old Britts. It’s interesting how I had 3 backfire devices in the box of parts. Everything went together very well and this is the first time I have experienced putting a chaincase together without some kind of issue. Even the stator to rotor gap was exactly right.
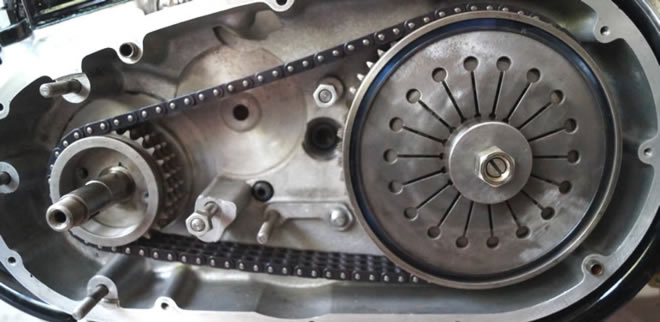
The end result:
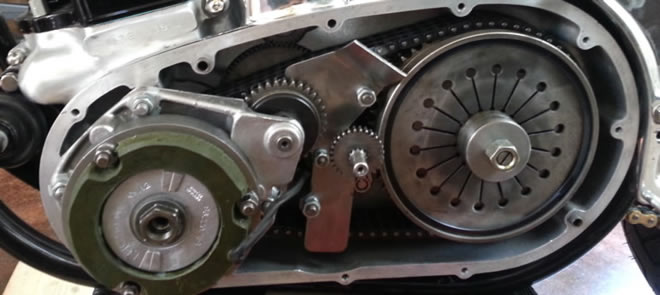
The primary chaincase filler caps were polished stainless ones from eurotrash and I forgot to mention the timing cover one was stainless too.
Frame Parts
The frame (not including wheels) was by far the most expensive and annoying part of this rebuild. So many parts were missing. Parts had been badly galvanized, so much so nothing fitted anymore.
On examination of the frame it was straight. It had been powder coated and then someone had dropped something on the main backbone and dented it. Since it is not a good idea to powder coat over filler, I decided to have the frame filled where the dent was and 2 part sprayed.
Originally I had the yokes sprayed, but the finish was the wrong color, so I had them powder coated for better results. New steering head bearings were fitted. The original owner had the swinging arm rebuilt and powder coated so I used it and trusted it was ok (so far so good).

I purchased new roadster bars. The tach was wrong (it was the Triumph Bonny type without the studs), so I purchased a new one on Ebay that has worked out. Both instrument holders were bent and broken so I found new ones.

When putting the rolling chassis together I ran into one problem after another, mainly due to parts missing. Just when I thought I had everything I needed I found I needed another small part to complete something. I know all rebuilds are like that, but this was extreme. Since there is so much to say about the frame, I am going to note the upgraded and interesting areas only.

- Swinging arm assembly was assembled and powder coated by previous owner.
- Forks had been rebuild.
- New hagon shocks.
- Custom SS seat knobs.
- Comstock head steady.
- Stainless exhaust mounts and rear foot pegs.
- All re-chromed and coated.
- New rear fender (I had a front one already from my existing parts).
- Paint work was done by the Vintage Vendor.
- Turn signals from Colorado Norton Works.
- Oil tank modification from Colorado Norton Works.
Since I was not going to use the original air filter, I had to come up with a solution to mount the left hand side panel. Fred sent me his template for the brackets he makes and sells as he was out of stock. I had a local company make me one identical out of stainless for and extortionate amount $.
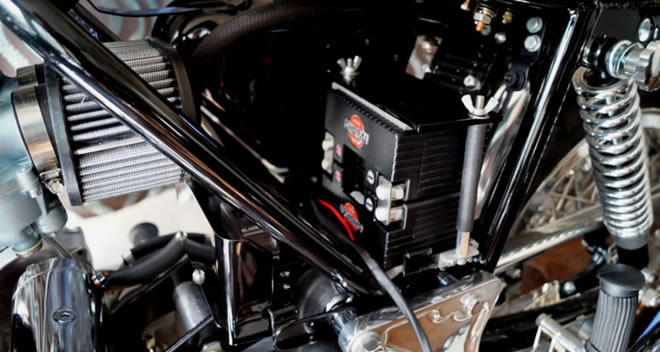
I decided to mount the batteries, yes 2 batteries in parallel (more details in electrical section), a different way so I made some brackets for that. Also in this photo you can see the plate I made to go behind the carbs. It was a piece of stainless that I had laying around, bent in the vice, filed and powder coated black:
I had a problem with the left hand foot peg. I did not realize it was sticking out too far (bent) when I had it chromed and until I fitted it. I did not want to buy another as they are so expensive if you can find one. so I heated it up and bent it inwards then had it re-chromed. I screwed up and bent it in too far (too much wine again). So I had to get that re-chromed twice, but it all worked out in the end.
I ordered a new seat and new tail light black plastic cover amongst other things. I was surprised they did not put the gold logo on the back of the seat was not printed straight and the tail light part was very badly made. These originated in Andover. I decided not to send them back though as it could have been over the top.
Wheels and Brakes
The previous owner had the wheels rebuilt using original rims that were in pretty good shape along with stainless spokes. They seemed like they were in good shape so the original plan was to use them. Only one disc came with the bike and all the brake gear was not looking good.

This is a classic example of when things get terribly out of control!
As mentioned, the plan was to try and use the wheels from the original owner. I sent the disc away along with another disc that I had in the garage to be resurfaced and drilled. I fitted the wheels assuming that they had been assembled properly. It wasn’t until a month or so later when I was fitting the front caliper that I noticed the off set for the front wheel had not been taken into consideration, so it did not fit at all. I evaluated how much I would have to spend to bring the original brakes to a good working standard.
At this time I was so over the wheels. When I thought I would have a rolling chassis, right back to square 1. All I knew was that I needed the Brembo front and rear brakes that Matt sells.
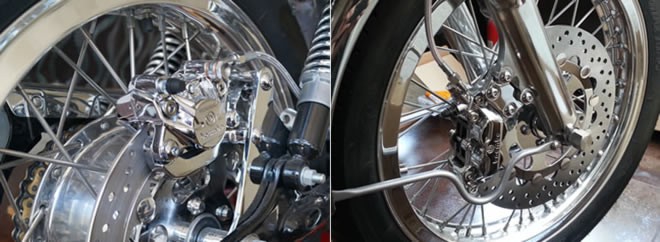
I took the wheels completely apart and it turned out they had crappy bearings in and the rear hub inner plate was rattling around. I rebuilt the rear hub with new cush drives and sealed bearings ( I put an oil seal over the sealed bearing even though it was not needed to make it look right). I rebuilt the front hub too with a double row sealed bearing and shorter spacer. I order Bridgestone BT45 tires and took the parts to Buchanan’s (luckily they are only 30 mins away from me). $1269 later I had new polished ally ribbed rims, polished hubs and correct hub/rim offset. At Buchanan’s they have a jig already set up for Commando wheels. Luckily they were able to re-use the stainless spokes that the old owner used.
While Buchanan’s were rebuilding the wheels I sold my MK2 to get some more $$. This enabled me to buy the Brembo systems including the front fender stay from Matt at Colorado Norton Works and helped me fund the rest of the rebuild, that was financially now way out of control..
As previously mentioned I had purchased a different style of rear sprocket that can easily be changed:
At the time it hurt me to sell my MK2 to fund these goodies, but now I am very happy I did.
Controls
As previously mentioned I used CNW handlebar controls along with The hydraulic clutch and Brembo brake master cylinder. The handlebar controls are of Japanese origin. The twist grip and all cables are standard and new as is the center console.
I was able to buy the warning light lenses for the center console. I found some bulbs at the local electronics shop that I siliconed into them and they work well.
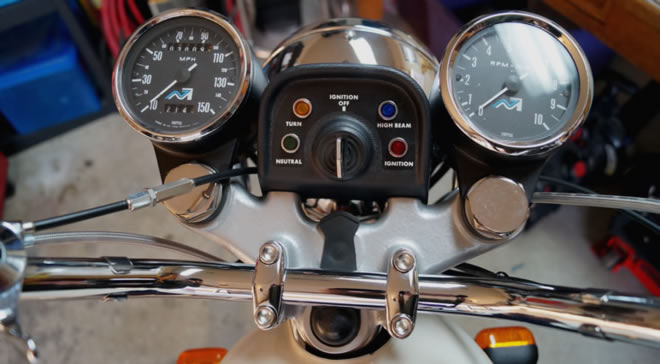
The speedo came with the bike and as of the photo that I just took below (Jan 4th 2014) I have 214 miles on the trip since the rebuild- I think it is original with just over 7000 miles. The tacho that came with the bike was the wrong one (off a Bonneville) so I sourced the one you see below from Ebay and it is in perfect condition.
Electrical
Smiths Digital Speedo and Tacho Upgrade (Added after 1000 miles)
Although the original Speedo and Tacho worked as well as expected I decided to upgrade to the new Smiths Digital Speedo and Tacho provided by Tom at www.smithsgaugesusa.com. I have 50 miles with the digital tacho and speedo now and am very impressed. Here are some photo’s, read on after for my detailed review of these Smiths digital gauges:
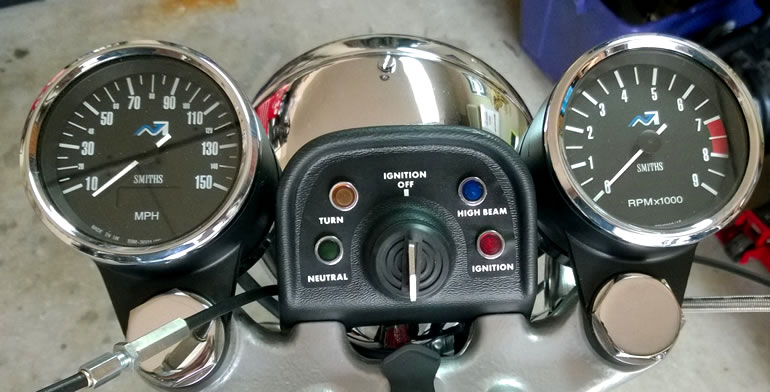
According to the instructions there are a few ways to setup the sending signal. I decided to use the sender that screws into the original speedo drive. I think there is a way to sense the signal by looking at a magnet on the wheel too. The sender unit screws into the speedo drive. It is important to make sure the brass spacer pictured on the left in the image below is in all the way. The wire coming from the sender is re-enforced.

The sender unit (see image above on the left) has a brass sleeve. In my case it would not locate properly as was too far back. I super glued it about 1/8″ from the end (opposite to where it is shown in the photo) so it would engage with the drive properly.
These instruments can be wired up for + or – ground. In my case +. Wiring and setting up the Tacho was straight forward. It wires to the coil. The Speedo was pretty straight forward too. I wired the main power to the gauges to a dedicated fuse and ignition switch. They have a night running light, so that was wired to lighting circuit.
Setting both gauges up requires touching a wire to ground, or using a toggle switch to switch through the options that are clearly outlined in the instructions. The Tacho options are for how many cylinders and mine was set correctly for 2 cylinders. The Speedo can be setup a few different ways, including riding a mile and toggling the wire or switch to tell the Speedo you have ridden a mile. Or you can do it with some calculations within your garage, basically by working out wheel rotation relative to Speedo drive rotation, then inputting this info into the Speedo by toggling the wire. I decided to do the second method. My speedo seems really accurate.
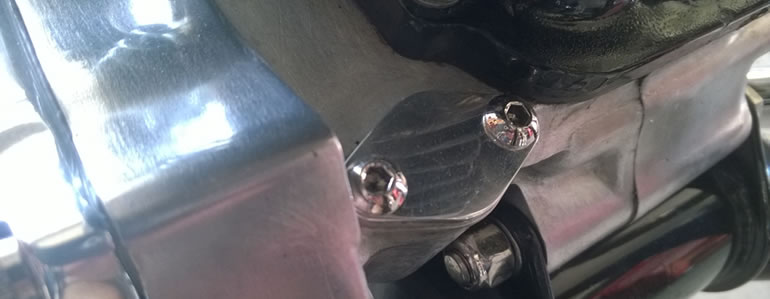
I have always hated the original Speedo and Tacho cables so getting rid of them was the first positive outcome. I ran the wires through the cable holes in the instrument covers and secured the covers with a black cable tie. After 50 miles of riding I have already forgotten how much I hated the original unpredictable Speedo. For more details about these gauges have a look at Tom’s site: http://smithsgaugesusa.com
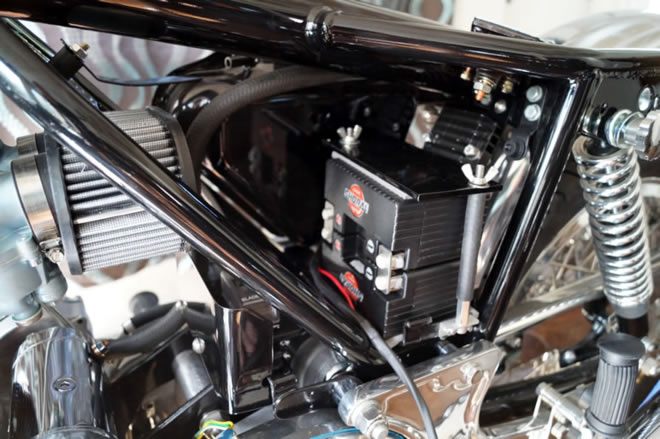
I used 2 Shorai 14 amp batteries paralleled together along with a Lucas 3 phase alternator and podtronics regulator that I mounted behind the battery by the solenoid. It is positive ground. I tried using a 12 volt solenoid that looked the same from West Marine, but it didn’t work so I ordered a new start solenoid along with its bracket as that was missing too. The starter is a 4 brush Prestolite with chromed shell. I purchased larger cables and ensured a good positive connection to chassis and motor.
For fuses I purchased and auto type water resistant 4 fuse block with LED to show which one is blown. I used 3 of the fuses for ignition, lights and everything else and have a 15 amp in each circuit for now. If you look at the photo below you can just see the fuse block in front of the battery where I mounted it.
The headlight is an H4 halogen unit and tail light is standard. I tried to fit the Lucas turn signals, but they are really crappy. So I purchased the ones Matt (CNW) has and I like the way these fit. As mentioned in the controls section the warning lights are standard with bulbs siliconed in.
Ignition is by “Tri-spark” along with a dual output high performance coil. I used a standard ignition switch that I refurbished.
99% of the wires are black and I soldered nearly all connections. I have been wiring up Commando’s like this for years and hardly ever have issues. If I do have a wiring issue, I am good with an OHM meter.
Conclusion
If you are not used to rebuilding Norton Commando’s and you get obsessed like I do, then always allow 4 times the amount of money that you thought it was going to cost and the same goes for time. If you are buying a bike to rebuild, try to find a bike that is running badly or at least bolted together still, so you can carefully label everything during strip down. Buying one already in parts is a bad idea as I found out. MK111 Commando’s have a lot more parts and for some reason the parts are more expensive and harder to get.
Although I went through hell getting this 1975 MK111 rebuilt to a high standard it is all worth it now. I have just over 200 miles on it. I have to say it is the BEST Commando that I have ever ridden and I am extremely happy. I cannot wait to get it broken in so I can ride it more. I think this bike will last me a long time and I am looking forward to putting many miles on it.
Thanks again for all those that have helped me and for the forum members for their on going support and activity and for keeping these Norton Commando’s on the road.
Jerry Doe – January 4th 2014

